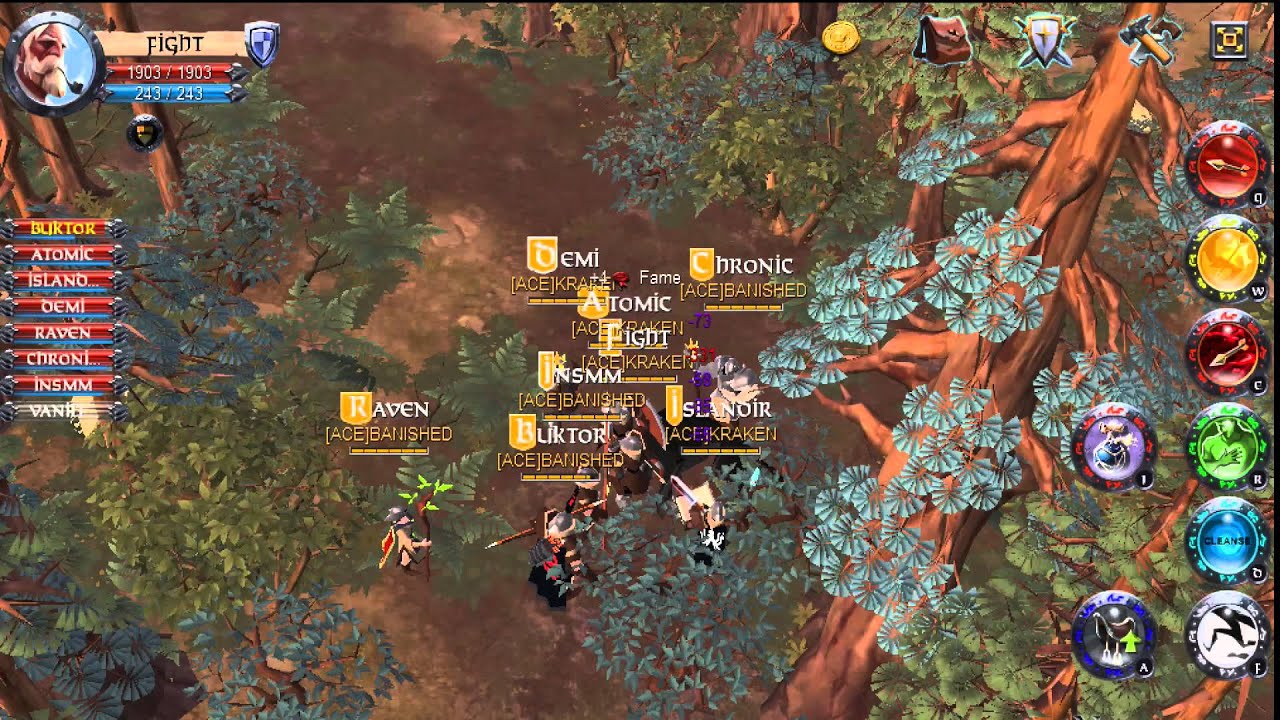
I think that's a cool idea. Black powder guns would be a high damage, slow rate of fire burst weapons! Capable of hitting hard with high up front damage however a slow auto attack/reload animation with high ability cooldowns keep it balanced. Of course these will be no modern assault rifles, just plain old crude flintlocks. If the heretics have the technology surely the royalist could too! Maybe you also need some Albion Gold can find on our site. Let's take a look at the following:
# Single Flintlock Pistol X.1
Abilities:
Heavy shot - A larger and denser calibre of round that gets embedded in the target, dealing damage and slowing them. Can stack.
Quick Draw - A single pistol is meant for dueling! Sharp on the draw, you attack speed for a short period.
Focus Fire - A well aimed shot intended to hit weak spots in opponents defense. Damage is increased for each stack of Heavy shot.
# Dual Pistols X.2
Abilities:
Heavy Shot (Same as above) or Piercing Round - A sharp projectile aimed at penetrating armour. Lowers defensive stats. Stacks.
Quick Draw (Same as above) or Gunslinger - Auto attacks deal increased damage stacking up over a short period of time.
Focus Fire (Same as above) or Suppressing Fire - Root target for a short amount of time at auto attack range. Dealing damage during a channel. Damage increased by stacks of Heavy Shot and Piercing Rounds.
Passive - Autos deal 10% more damage or 20% chance to cause bleed on target.
# Musket X.3
Abilities:
Heavy Shot/Piercing Shot
Gunslinger or Bayonet Charge - Charge forward with bayonet attached rooting target. Increased by Heavy Shot/Piercing Round Stacks.
Load Shrapnel - Deal damage in a cone. Increased damage the closer the target is to player.
Passive - Same as Dual Pistols - (Possibly another passive that gives 10% cooldown
With the addition of the new Heretic dungeons in recent patches and their introduction of gunpowder e.g mortars and cannoneers perhaps we as players could get in on the action! Do you want to join us? Click UPAlbion!
Showing posts with label Albion Online Guide. Show all posts
Tuesday, 5 July 2016
Wednesday, 22 June 2016
Albion Online GvG Beginner’s Guide
The following guide will pertain to the current GvG system, and will be amended when we get closer to Beta 2 (with access to more information on the exact changes to come). Enjoy!
# Intro
A GvG is one of the most important parts of Albion, and without a complete understanding of what exactly they are or how they work, players aren’t getting everything they can out of the game. This guide will hopefully serve as a platform for introducing newcomers to what exactly a GvG is, and get them prepared for guild participation in these frequent events.
# Purpose
A GvG is necessary in Albion if you or your guild wish to stake a claim in the world, and own a piece of it. Depending on the state of ownership of a territory, you may:
- Claim: territory has no ownership and you may take it via the ‘territory manager’ building.
- Drop: you own the territory and may relinquish it (may be claimed by anyone).
- Defend: you own the territory and must defend it against an attacking guild.
- Attack: you do not own the territory and are fighting to take it.
- Raid: attacking a territory to drop its defender bonus (Raids are being removed).
# Defender Bonus
If you press “K” you’ll notice that all the territories have a number above them, and it will be positive, zero, or negative. The number you see represents the percentage “buff” or “de-buff” the defenders will have when you fight them. For example, if you declare an attack against a territory at ‘40’ defender bonus, be ready to fight players with a 40% stat bonus on their side.The defender bonus will change though a few ways. If a “raid” (will be removed from game) is placed on a territory, if successful will drop the defender bonus. Also note, if an attack is placed by the territory onto another territory, the attackers will suffer a ten (10) point loss from their defender bonus.
# Defender Points
All territories have ‘defender points’. You may consider these as “lives”. After a GvG, if the owner of the territory loses, they lose one point. On the last point, if the attackers win, they take the territory. If you are the defender and lose, you may slowly regain your defender points over time.
- City & Village Territory: may have up to three (3) defender points.
- Resource Territory: will only ever have one (1) defender point.
# Scoring & Objectives
During a GvG, there will be monoliths that you want to either attack or defend.You will see these points marked around the territory as giant rune-looking stones. A resource territory will have three (3) on the map, and a village/city territory will have four (4). Capturing these points essentially means nothing, you have to hold them.
If you look at the top of your screen during a GvG you will see two separate timers, one on top of the other. The 'lower' timer displays the amount of time left in the GvG, and once it reaches zero the defenders win (regardless of the scoreboard). The 'upper' timer is the important one; it’s a sixty (60) second timer that keeps refreshing itself. Once this timer reaches zero (depending on how many points a team has) the points will be tallied and deducted from their score. The first team that has their score reach zero, will lose.
Each team starts with 150 points, points deducted via captured objectives are as follows:
Captured / Points
1 / 10
2 / 10
3 / 20
4 / 20
Also, an important thing to remember is that a GvG isn’t about “getting kills” but more so about working together and using strategy to outsmart your opponent and win on the ‘Scoreboard’. However, you are rewarded for kills.
- KILL = 4 points
# What You Need
If you have not participated in a GvG before, then you may be surprised with how much goes into planning one, and how much you need.
- Gear
Yes, you will need a bit of gear. Depending on how well you do, you may die a lot or not at all. Personally, anywhere between four (4) and five (5) sets of gear is okay. So have this set aside and ready. For yellow zones be sure that the gear you bring is Tier 7 equivalent (7.1/6.2/5.3), as the item-power for yellow zones caps out around Tier 7.
- Stashing Gear
Gear (food, etc.) has to be put into a chest before the GvG starts (you may have it in your inventory, but I do not recommend this). This chest will be found in the territory you own, or at the Siege Camp you placed the attack from. Be sure that you put everything into the battle chest tab, and not the bank tab. If you put anything into the “bank” tab, it will not be accessible during the GvG. It’s also a good practice to organize your gear in the chest as well (split your food/potion stacks into 1’s to make it easier to only equip one, etc).
Also note, that you must put your gear into the chest from where your guild placed the attack from (siege camp), or in the territory from which you are defending. This means that if you are defending, you cannot put your gear into the siege camp from which the attackers placed their attack. If you do, you will not be able to access the gear during the fight.
- Food & Potions
Bring the best food and potions you can afford, because every stat counts. Make sure you have one food/potion for each set of gear you are bringing.
- Team
Depending on whether the GvG is based in a normal territory or a city, you will need either five (5) or twenty (20) players on your team. You may of course have less, but it’s not recommended.
- Territory/Target
If you have a territory, you must only wait (and feed the territory…) and you will be attacked, it’s only a matter of time. If you do not have a territory and you want one, then you will need to place an attack on one via a “Siege Camp”.
- Silver
Waging war isn’t cheap. Besides the gear you bring along, you have to pay to launch any and all attacks (only Warmaster + may declare attacks); launching from the territory costs 100k and from a siege camp, 250k. Also be sure to remember that you have to feed territories you own, and the food costs pile up. Must earn enough Albion Online Silver.
# Be On Time
A lot of guilds require you to be online a certain amount of time before a GvG in order to get ready and discuss some sort of strategy. This is a good practice and will lead to better organization and preparation for the team. Everyone will appreciate this. Also be sure you are in the same zone that the GvG is taking place in, or the zone where the attack came from. If the GvG starts and you are not in the correct zone, you will not be able to participate.
# Participation & Lockouts
You may only participate in one GvG every 24 hours. However, if there is more than on GvG in that same territory that day (or a nearby territory it touches), you may participate in those as well (as many times as you like).It is also worth noting that if you are signed up for a GvG and your guild decides not to participate, you will still be put on a 24-hour lockout period if you do not show up. If you do not have the members or decide not to participate, remember that you must leave the GvG team in order to not be locked out.
# When You Can Fight
All territories come with four (4) time slots for GvGs. These four times should best reflect the availability of your guild to defend the territory. This means that as an attacker, you may only place attacks at times that are provided by the defending territory.Also note, the only way to change the time slots of the territory is to go to the ‘territory manager’ building and drop ownership of it for a moment. Quickly reclaim ownership and you will be able to change the times in which others can attack you.
# Be Warned
If you have an impending attack or a planned attack already, do not drop the territory, as the attacker will immediately win the territory by default.
# Quick Equip
Going into a GvG you should always have the mindset that you are going to win. However, you may still die, and if you do you want to be as prepared as possible to get back in the action. Quick equip is a fantastic tool to use (especially for GvGs). If you happen to die, quick equip will save you and your team valuable time by getting you back into the fight much, much faster (be mindful though, that mounts/bags in the chest will be equipped as well if present). Every chest has the quick equip ‘button’ at the bottom. Also note that if you bring several different sets to a GvG, this option may not work very well for you.
# Final Comments
This guide reflects the current GvG system, and will not be the same in the future. This is to help newcomers now and have them get some GvG experience and have some sort of idea how GvGs work. I also realize that a lot of the information here is also only for the Warmaster position and above, but I hope it still helps shed some light on the subject. Take a glance over at the Upcoming GvG changes to get a better idea of what's to come! More cheaper Albion Online Gold can find our site here.
# Intro
A GvG is one of the most important parts of Albion, and without a complete understanding of what exactly they are or how they work, players aren’t getting everything they can out of the game. This guide will hopefully serve as a platform for introducing newcomers to what exactly a GvG is, and get them prepared for guild participation in these frequent events.
# Purpose
A GvG is necessary in Albion if you or your guild wish to stake a claim in the world, and own a piece of it. Depending on the state of ownership of a territory, you may:
- Claim: territory has no ownership and you may take it via the ‘territory manager’ building.
- Drop: you own the territory and may relinquish it (may be claimed by anyone).
- Defend: you own the territory and must defend it against an attacking guild.
- Attack: you do not own the territory and are fighting to take it.
- Raid: attacking a territory to drop its defender bonus (Raids are being removed).
# Defender Bonus
If you press “K” you’ll notice that all the territories have a number above them, and it will be positive, zero, or negative. The number you see represents the percentage “buff” or “de-buff” the defenders will have when you fight them. For example, if you declare an attack against a territory at ‘40’ defender bonus, be ready to fight players with a 40% stat bonus on their side.The defender bonus will change though a few ways. If a “raid” (will be removed from game) is placed on a territory, if successful will drop the defender bonus. Also note, if an attack is placed by the territory onto another territory, the attackers will suffer a ten (10) point loss from their defender bonus.
# Defender Points
All territories have ‘defender points’. You may consider these as “lives”. After a GvG, if the owner of the territory loses, they lose one point. On the last point, if the attackers win, they take the territory. If you are the defender and lose, you may slowly regain your defender points over time.
- City & Village Territory: may have up to three (3) defender points.
- Resource Territory: will only ever have one (1) defender point.
# Scoring & Objectives
During a GvG, there will be monoliths that you want to either attack or defend.You will see these points marked around the territory as giant rune-looking stones. A resource territory will have three (3) on the map, and a village/city territory will have four (4). Capturing these points essentially means nothing, you have to hold them.
If you look at the top of your screen during a GvG you will see two separate timers, one on top of the other. The 'lower' timer displays the amount of time left in the GvG, and once it reaches zero the defenders win (regardless of the scoreboard). The 'upper' timer is the important one; it’s a sixty (60) second timer that keeps refreshing itself. Once this timer reaches zero (depending on how many points a team has) the points will be tallied and deducted from their score. The first team that has their score reach zero, will lose.
Each team starts with 150 points, points deducted via captured objectives are as follows:
Captured / Points
1 / 10
2 / 10
3 / 20
4 / 20
Also, an important thing to remember is that a GvG isn’t about “getting kills” but more so about working together and using strategy to outsmart your opponent and win on the ‘Scoreboard’. However, you are rewarded for kills.
- KILL = 4 points
# What You Need
If you have not participated in a GvG before, then you may be surprised with how much goes into planning one, and how much you need.
- Gear
Yes, you will need a bit of gear. Depending on how well you do, you may die a lot or not at all. Personally, anywhere between four (4) and five (5) sets of gear is okay. So have this set aside and ready. For yellow zones be sure that the gear you bring is Tier 7 equivalent (7.1/6.2/5.3), as the item-power for yellow zones caps out around Tier 7.
- Stashing Gear
Gear (food, etc.) has to be put into a chest before the GvG starts (you may have it in your inventory, but I do not recommend this). This chest will be found in the territory you own, or at the Siege Camp you placed the attack from. Be sure that you put everything into the battle chest tab, and not the bank tab. If you put anything into the “bank” tab, it will not be accessible during the GvG. It’s also a good practice to organize your gear in the chest as well (split your food/potion stacks into 1’s to make it easier to only equip one, etc).
Also note, that you must put your gear into the chest from where your guild placed the attack from (siege camp), or in the territory from which you are defending. This means that if you are defending, you cannot put your gear into the siege camp from which the attackers placed their attack. If you do, you will not be able to access the gear during the fight.
- Food & Potions
Bring the best food and potions you can afford, because every stat counts. Make sure you have one food/potion for each set of gear you are bringing.
- Team
Depending on whether the GvG is based in a normal territory or a city, you will need either five (5) or twenty (20) players on your team. You may of course have less, but it’s not recommended.
- Territory/Target
If you have a territory, you must only wait (and feed the territory…) and you will be attacked, it’s only a matter of time. If you do not have a territory and you want one, then you will need to place an attack on one via a “Siege Camp”.
- Silver
Waging war isn’t cheap. Besides the gear you bring along, you have to pay to launch any and all attacks (only Warmaster + may declare attacks); launching from the territory costs 100k and from a siege camp, 250k. Also be sure to remember that you have to feed territories you own, and the food costs pile up. Must earn enough Albion Online Silver.
# Be On Time
A lot of guilds require you to be online a certain amount of time before a GvG in order to get ready and discuss some sort of strategy. This is a good practice and will lead to better organization and preparation for the team. Everyone will appreciate this. Also be sure you are in the same zone that the GvG is taking place in, or the zone where the attack came from. If the GvG starts and you are not in the correct zone, you will not be able to participate.
# Participation & Lockouts
You may only participate in one GvG every 24 hours. However, if there is more than on GvG in that same territory that day (or a nearby territory it touches), you may participate in those as well (as many times as you like).It is also worth noting that if you are signed up for a GvG and your guild decides not to participate, you will still be put on a 24-hour lockout period if you do not show up. If you do not have the members or decide not to participate, remember that you must leave the GvG team in order to not be locked out.
# When You Can Fight
All territories come with four (4) time slots for GvGs. These four times should best reflect the availability of your guild to defend the territory. This means that as an attacker, you may only place attacks at times that are provided by the defending territory.Also note, the only way to change the time slots of the territory is to go to the ‘territory manager’ building and drop ownership of it for a moment. Quickly reclaim ownership and you will be able to change the times in which others can attack you.
# Be Warned
If you have an impending attack or a planned attack already, do not drop the territory, as the attacker will immediately win the territory by default.
# Quick Equip
Going into a GvG you should always have the mindset that you are going to win. However, you may still die, and if you do you want to be as prepared as possible to get back in the action. Quick equip is a fantastic tool to use (especially for GvGs). If you happen to die, quick equip will save you and your team valuable time by getting you back into the fight much, much faster (be mindful though, that mounts/bags in the chest will be equipped as well if present). Every chest has the quick equip ‘button’ at the bottom. Also note that if you bring several different sets to a GvG, this option may not work very well for you.
# Final Comments
This guide reflects the current GvG system, and will not be the same in the future. This is to help newcomers now and have them get some GvG experience and have some sort of idea how GvGs work. I also realize that a lot of the information here is also only for the Warmaster position and above, but I hope it still helps shed some light on the subject. Take a glance over at the Upcoming GvG changes to get a better idea of what's to come! More cheaper Albion Online Gold can find our site here.
Tuesday, 21 June 2016
Albion: Be Careful The Scamming of the Gameplay
Be careful those ‘Legendary' weapons! They will spend you all money then make you poorer!
You all know how that works. Out of the blue someone send a battle request and because you are clicking like a maniac, and the ‘Accept' button is right in front of the re-roll button I click accept battle!
I fight the guy/girl and lose, walking back to the repair station. I want to go on with re-rolling, but it says ‘not enough money'… I am like huh…?
What happened?? Looking in my combat log and I see this:
This happens a lot guys… So I warn you! Please watch out with re-rolling, and please pay attention when someone send you a ‘battle request'. You lose all your money that you worked for so hard, in one simple click.
Typical scam situations
1. You standing in the middle of a busy town, someone fight you all the time. You fight him and win all of the time. He send you a request again, without you knowing he added 1000000 to the request. Because you were fighting him a lot you click accept without noticing this change. The fight is starting, that other guy is walking to his chest, grabs his best gear, fight you, you lose and you can wave your 1000000 goodbye;
2. This happens to me: You are re-rolling in a busy town and without you knowing this battle request pops up you click accept and you are screwed.
These are the two ways I know about, do noticed another way please send it in the reply and I will add it to this topic.
There is not really a way to fix this. You are already told in a fairly prominent location when the duel is requested how much the duel will be for. Maybe they could make the amount bright red but that still wouldn't fix the issue you're talking about if you're accepting on auto-pilot. For the problem of rerolling and auto-accepting a duel they added a timer (3 seconds) before you'd be able to hit accept. This was a fix they implemented quite a while ago now. In this way the button to accept a duel comes across as completely different to anyone who is paying any sort of attention because suddenly you get a button with a timer that you can't immediately click on.
I am not saying scamming still can't happen.It definitely can to people who aren't paying much, or any, attention. I don't see a way to further reduce it without severely limiting the dueling system, however.
Remember these Guides, if you don't want lose your Albion Online Gold and Silver~
You all know how that works. Out of the blue someone send a battle request and because you are clicking like a maniac, and the ‘Accept' button is right in front of the re-roll button I click accept battle!
I fight the guy/girl and lose, walking back to the repair station. I want to go on with re-rolling, but it says ‘not enough money'… I am like huh…?
What happened?? Looking in my combat log and I see this:
This happens a lot guys… So I warn you! Please watch out with re-rolling, and please pay attention when someone send you a ‘battle request'. You lose all your money that you worked for so hard, in one simple click.
Typical scam situations
1. You standing in the middle of a busy town, someone fight you all the time. You fight him and win all of the time. He send you a request again, without you knowing he added 1000000 to the request. Because you were fighting him a lot you click accept without noticing this change. The fight is starting, that other guy is walking to his chest, grabs his best gear, fight you, you lose and you can wave your 1000000 goodbye;
2. This happens to me: You are re-rolling in a busy town and without you knowing this battle request pops up you click accept and you are screwed.
These are the two ways I know about, do noticed another way please send it in the reply and I will add it to this topic.
There is not really a way to fix this. You are already told in a fairly prominent location when the duel is requested how much the duel will be for. Maybe they could make the amount bright red but that still wouldn't fix the issue you're talking about if you're accepting on auto-pilot. For the problem of rerolling and auto-accepting a duel they added a timer (3 seconds) before you'd be able to hit accept. This was a fix they implemented quite a while ago now. In this way the button to accept a duel comes across as completely different to anyone who is paying any sort of attention because suddenly you get a button with a timer that you can't immediately click on.
I am not saying scamming still can't happen.It definitely can to people who aren't paying much, or any, attention. I don't see a way to further reduce it without severely limiting the dueling system, however.
Remember these Guides, if you don't want lose your Albion Online Gold and Silver~
Monday, 13 June 2016
Abilities And Skills in Albion Online
Ability can be changed at any time by just changing gear. If you want to be a spell caster instead of a warrior, you only need to wear a casting staff instead of a sword.
All skills in Albion Online are associated with gear as well. These skills are applied on gear when you actually craft the item, and most items are crafted, or when the item actually drops. Some items will drop from humanoid enemies, so if you see a guy using a bow, there’s a chance he can drop a bow of his relevant tier. For example, if he’s a tier five enemy, he can drop a tier five bow.
Skills change also depends on items. Spear is going to have a different skill set to a bow although they are considered under that similar style of being a ranger or being a hunter. In addition, when you craft your own gear, you have choice to decide which skills you want it to have. More skills become available as you progress.
It goes the same way with armor. There are several types of armor in Albion Online and each of them has a various types of skills as mention in this beginner guide. You can have a choice to choose which skills you want through crafting as well. For example, when you craft a chest armor, you have choice either you want to have self-healing skill or a berserker buff.
Crafting can be quite expensive but it’s a good way of an investment. And it’s going to be the main focus on the game since classes are entirely dependent on gear. Because of this, Albion Online character progression is very complex.
Do you want to learn more? Please click UPAlbion.com.
All skills in Albion Online are associated with gear as well. These skills are applied on gear when you actually craft the item, and most items are crafted, or when the item actually drops. Some items will drop from humanoid enemies, so if you see a guy using a bow, there’s a chance he can drop a bow of his relevant tier. For example, if he’s a tier five enemy, he can drop a tier five bow.
Skills change also depends on items. Spear is going to have a different skill set to a bow although they are considered under that similar style of being a ranger or being a hunter. In addition, when you craft your own gear, you have choice to decide which skills you want it to have. More skills become available as you progress.
It goes the same way with armor. There are several types of armor in Albion Online and each of them has a various types of skills as mention in this beginner guide. You can have a choice to choose which skills you want through crafting as well. For example, when you craft a chest armor, you have choice either you want to have self-healing skill or a berserker buff.
Crafting can be quite expensive but it’s a good way of an investment. And it’s going to be the main focus on the game since classes are entirely dependent on gear. Because of this, Albion Online character progression is very complex.
Do you want to learn more? Please click UPAlbion.com.
Friday, 10 June 2016
Albion Online Tips to Tell You - Built is So Easy
We will teach you how to build, are you ready?
Have mobs drop a range of Albion Online Silver, not a static number.
Different Mouse-over icons for the various gathering materials: Axe = wood, pick = ore, etc.
Loot needs to be highlighted when behind trees/etc.
Blood splatters when Demo-ing buildings. Olly makes sense if they’re mutated zerglings
The sound for adding resources to buildings doesn’t fit, just sounds like a sword swinging at air
Volume Slider for Mount Movement/Steps would be nice as it tends to be significantly louder than everything else around and can be obnoxious.
Increased base carrying weight seems useful or a slower reduction in movement based on weight. I max out on weight pretty quickly and it just “feels” like a longer time would be helpful. Then again, the world is much emptier than it would be at launch so I’m able to gather materials a lot faster than I could in that situation and it might fit better at that time.
Variety in monster/mob attack sequences/spell casts and Variety in damage output. Hitting for 39 every time I swing on a mob that does the same sequence of attacks and spellcasts turns into an incredibly repetitive combat encounter.
A suggestion to consider, not saying I’d recommend it, just something for more game-design savvy people to think about: Reset the materials needed to make T5+ processed goods so that T5 needs no pre-requisite, just like T1/Some T2. Then T6 needs a processed T5 + raw T6, same w/ T 7 and 8 etc. It seems like it would be a nice refresher after working your way up to T4 and could help reduce some of the monotony of always having to go back to low-tier resources.
Create a purpose for the random buildings, ruins, etc placed everywhere. Give them some things to search, destroy, have them randomly spawn mobs/bosses, etc.
Add tank viability w/ swords? Just a preference by me here.
Better visibility in large-scale combat. Distinguishing between allies, enemies, PVE mobs, etc, can’t be extremely difficult. Allow me to turn off allied cast bars so I can see enemy cast bars better. A better indicator of who my target is would be nice so I don’t get lost on where it went in hectic combat. Also, an auto-target feature would be useful as when the battlefield is cluttered, I’m often unable to target an enemy because my allies are crowding it.
Designation for weapons to show if they are 1h or 2h.
Good Luck! And more guides in UPAlbion.com.
Have mobs drop a range of Albion Online Silver, not a static number.
Different Mouse-over icons for the various gathering materials: Axe = wood, pick = ore, etc.
Loot needs to be highlighted when behind trees/etc.
Blood splatters when Demo-ing buildings. Olly makes sense if they’re mutated zerglings
The sound for adding resources to buildings doesn’t fit, just sounds like a sword swinging at air
Volume Slider for Mount Movement/Steps would be nice as it tends to be significantly louder than everything else around and can be obnoxious.
Increased base carrying weight seems useful or a slower reduction in movement based on weight. I max out on weight pretty quickly and it just “feels” like a longer time would be helpful. Then again, the world is much emptier than it would be at launch so I’m able to gather materials a lot faster than I could in that situation and it might fit better at that time.
Variety in monster/mob attack sequences/spell casts and Variety in damage output. Hitting for 39 every time I swing on a mob that does the same sequence of attacks and spellcasts turns into an incredibly repetitive combat encounter.
A suggestion to consider, not saying I’d recommend it, just something for more game-design savvy people to think about: Reset the materials needed to make T5+ processed goods so that T5 needs no pre-requisite, just like T1/Some T2. Then T6 needs a processed T5 + raw T6, same w/ T 7 and 8 etc. It seems like it would be a nice refresher after working your way up to T4 and could help reduce some of the monotony of always having to go back to low-tier resources.
Create a purpose for the random buildings, ruins, etc placed everywhere. Give them some things to search, destroy, have them randomly spawn mobs/bosses, etc.
Add tank viability w/ swords? Just a preference by me here.
Better visibility in large-scale combat. Distinguishing between allies, enemies, PVE mobs, etc, can’t be extremely difficult. Allow me to turn off allied cast bars so I can see enemy cast bars better. A better indicator of who my target is would be nice so I don’t get lost on where it went in hectic combat. Also, an auto-target feature would be useful as when the battlefield is cluttered, I’m often unable to target an enemy because my allies are crowding it.
Designation for weapons to show if they are 1h or 2h.
Good Luck! And more guides in UPAlbion.com.
Tuesday, 7 June 2016
Albion Online Guide to Weapons and Armor in Classless PvP
Someone asked how to tell what your enemies will be doing in PvP. Well, it's hard to tell what defines each type of weapon and armor without clicking through every item on the destiny board, so here's a quick breakdown of what makes each item unique!
Weapons
Q: Signature (Spam) Ability. 1.5-3s CD(or cast time)
Each Weapon Type (sword, bow, fire staff, hammer, etc) will have their own Q ability which is the same across all tiers. Most have a small special effect or characteristic (slow, poison, armor reduction).
Support weapons have a damage option and a heal/shield option. Bow has a second option on T5
W: Utility Ability. 7-10s CD
Each Weapon Type has their own set of 1-3 options (mostly two - one for more damage/healing, one for more special effects). These have special effects such as interrupts, slows, shield, fears, damage over time, dashes, knockbacks.
E: Ultimate (Special) Ability 15-30s CD
Each Weapon Type has a similar flavor or effect, but every weapon has their own Ultimate/Special Ability. Typically 2 of the weapons in a particular Type will have similar effects (broadsword gives armor/mr, claymore also gives armor/mr; staves all have knockbacks; spears have a dash and a pull; bows have AoEs).
Weapon Passive
Each Weapon Type has two passives, but only in their two-handed versions (Tx.2 and Tx.3 for most Types). Think "10% chance to gain damage/attackspeed/bleed/slow/castspeed". Typically one damage boost, one utility boost (attack range or energy or a slow) but it varies.
Identifying Weapons
You'll be able to instantly see if they have a sword, or a bow, or a certain staff, at which point you will know if they're going to be Q spamming a slow or damage. You'll have to remember that certain weapon types have different W abilities for utility, and wait to see if they have it as a damage boost or for utility. You'll have to remember that certain weapons have high dps, certain weapons have stuns and crowd control. You won't be able to tell what passive they have without inspecting them. And last, each weapon has a very different model, so you'll be able to tell what their Ult/Special is going to be.
Full List of Abilities by Devious[1]
Armor
Armor is a little harder - each Armor Type has different abilities, while Armor Material determines the type of defense.
Here's a picture from the forums a few weeks ago that shows all of the armor in the game: armor models, check it out![2]
R: Boost Ability - Helm - 30s CD
Helms give an ability to boost your stats for ~5 seconds - damage, movement speed, or defense, determined by your Armor Type. These give people a short time for surprise burst, sticking power, or tanking.
D: Role (Utility) Ability - Chest - 30s CD
Chest armor gives you an ability to help you fulfill your typical MMO roles in a fight as a mage, fighter, or tank. Light armor helps you survive, medium armor helps you stick around to deal damage, and heavy armor helps you barge in and disrupt the enemy team. These all have both offensive and defensive uses.
F: Speed Boost - Feet - 20s (or 60s) CD
Boots give you a speed boost, they all have the same icon right now so you won't be able to tell which one people have in a fight.
Armor Passive - All
Light armor gives you better spells (increased damage, healing, or cast speed).
Medium armor gives you better sticking power (increased speed, CC resistance, or better CC).
Heavy armor gives you better defense (increased life, armor, or thorns damage).
Armor Types
Heavy armor has high health, armor, and magic resistance.
Medium armor has a 25% damage/healing boost, medium health/armor/magic resistance.
Light armor has a 50% damage/healing boost, and low health/armor/magic resistance.
Armor Styles
Heavy Armor has huge full helms that cover the face, bulky layered chest/legs, and giant shoulder armor.
Medium Armor has open-faced helms, thin/loose chests and sleeves, and small shoulder armor.
Light Armor has scarves, open-faced chest, short sleeves, and no shoulder armor.
Armor Materials - Determined by Chest Material
Plate Armor has ~10% more armor than magic resistance.
Leather Armor has equal armor and magic resistance.
Cloth Armor has ~10% less armor than magic resistance.
Check the size of their shoulders to see what type of chest piece they have, you NEED to know if they are going to be dealing lots of damage or taking lots of damage, and whether or not they can chase you down. Next most important is their helm - full, half, or scarf? This will determine if they can boost their damage, speed, or sticking power. Boots don't really matter, they have the same abilities and a very small damage or utility boost that will probably match the chest or helm.
Full List of Armor Details by Devious[3]
Bonus Info: Tiers
The Good: you can tell which Tier (1-8) people have based on the color of their armor or weapon. The Bad: you can't tell which Class (x.1, x.2, x.3,etc) people have based on the color of their armor or weapon.
T4.1 Heavy Plate is blue and has a power level of exactly Tier 4.1 for it's health, armor, and magic resistsance. T4.2 Heavy Leather is also blue, but has the power level of T5.1 gear. Someone wearing T4.3 Heavy Cloth would have total power level of T6.1 Heavy Plate, leading to slightly hidden power differences.
Weapons are the same: T4.1 Broadswoards are blue, but the T4.2 Claymore (also blue) has a power level equal to the T5.1 Broadsword. A T4.3 Glaive has the power level of a T6.1 Broadsword.
So, in addition to looking at their weapons to see their spells, and armor to see their role, also keep in mind the power spike as you go up in rarity. The more advanced (and unusual) the armor is, the higher the item power.
Power Chart with Developer Explanation at the bottom[4] also by Devious
Want to learn more? Click UPAlbion.com.
Weapons
Q: Signature (Spam) Ability. 1.5-3s CD(or cast time)
Each Weapon Type (sword, bow, fire staff, hammer, etc) will have their own Q ability which is the same across all tiers. Most have a small special effect or characteristic (slow, poison, armor reduction).
Support weapons have a damage option and a heal/shield option. Bow has a second option on T5
W: Utility Ability. 7-10s CD
Each Weapon Type has their own set of 1-3 options (mostly two - one for more damage/healing, one for more special effects). These have special effects such as interrupts, slows, shield, fears, damage over time, dashes, knockbacks.
E: Ultimate (Special) Ability 15-30s CD
Each Weapon Type has a similar flavor or effect, but every weapon has their own Ultimate/Special Ability. Typically 2 of the weapons in a particular Type will have similar effects (broadsword gives armor/mr, claymore also gives armor/mr; staves all have knockbacks; spears have a dash and a pull; bows have AoEs).
Weapon Passive
Each Weapon Type has two passives, but only in their two-handed versions (Tx.2 and Tx.3 for most Types). Think "10% chance to gain damage/attackspeed/bleed/slow/castspeed". Typically one damage boost, one utility boost (attack range or energy or a slow) but it varies.
Identifying Weapons
You'll be able to instantly see if they have a sword, or a bow, or a certain staff, at which point you will know if they're going to be Q spamming a slow or damage. You'll have to remember that certain weapon types have different W abilities for utility, and wait to see if they have it as a damage boost or for utility. You'll have to remember that certain weapons have high dps, certain weapons have stuns and crowd control. You won't be able to tell what passive they have without inspecting them. And last, each weapon has a very different model, so you'll be able to tell what their Ult/Special is going to be.
Full List of Abilities by Devious[1]
Armor
Armor is a little harder - each Armor Type has different abilities, while Armor Material determines the type of defense.
Here's a picture from the forums a few weeks ago that shows all of the armor in the game: armor models, check it out![2]
R: Boost Ability - Helm - 30s CD
Helms give an ability to boost your stats for ~5 seconds - damage, movement speed, or defense, determined by your Armor Type. These give people a short time for surprise burst, sticking power, or tanking.
D: Role (Utility) Ability - Chest - 30s CD
Chest armor gives you an ability to help you fulfill your typical MMO roles in a fight as a mage, fighter, or tank. Light armor helps you survive, medium armor helps you stick around to deal damage, and heavy armor helps you barge in and disrupt the enemy team. These all have both offensive and defensive uses.
F: Speed Boost - Feet - 20s (or 60s) CD
Boots give you a speed boost, they all have the same icon right now so you won't be able to tell which one people have in a fight.
Armor Passive - All
Light armor gives you better spells (increased damage, healing, or cast speed).
Medium armor gives you better sticking power (increased speed, CC resistance, or better CC).
Heavy armor gives you better defense (increased life, armor, or thorns damage).
Armor Types
Heavy armor has high health, armor, and magic resistance.
Medium armor has a 25% damage/healing boost, medium health/armor/magic resistance.
Light armor has a 50% damage/healing boost, and low health/armor/magic resistance.
Armor Styles
Heavy Armor has huge full helms that cover the face, bulky layered chest/legs, and giant shoulder armor.
Medium Armor has open-faced helms, thin/loose chests and sleeves, and small shoulder armor.
Light Armor has scarves, open-faced chest, short sleeves, and no shoulder armor.
Armor Materials - Determined by Chest Material
Plate Armor has ~10% more armor than magic resistance.
Leather Armor has equal armor and magic resistance.
Cloth Armor has ~10% less armor than magic resistance.
Check the size of their shoulders to see what type of chest piece they have, you NEED to know if they are going to be dealing lots of damage or taking lots of damage, and whether or not they can chase you down. Next most important is their helm - full, half, or scarf? This will determine if they can boost their damage, speed, or sticking power. Boots don't really matter, they have the same abilities and a very small damage or utility boost that will probably match the chest or helm.
Full List of Armor Details by Devious[3]
Bonus Info: Tiers
The Good: you can tell which Tier (1-8) people have based on the color of their armor or weapon. The Bad: you can't tell which Class (x.1, x.2, x.3,etc) people have based on the color of their armor or weapon.
T4.1 Heavy Plate is blue and has a power level of exactly Tier 4.1 for it's health, armor, and magic resistsance. T4.2 Heavy Leather is also blue, but has the power level of T5.1 gear. Someone wearing T4.3 Heavy Cloth would have total power level of T6.1 Heavy Plate, leading to slightly hidden power differences.
Weapons are the same: T4.1 Broadswoards are blue, but the T4.2 Claymore (also blue) has a power level equal to the T5.1 Broadsword. A T4.3 Glaive has the power level of a T6.1 Broadsword.
So, in addition to looking at their weapons to see their spells, and armor to see their role, also keep in mind the power spike as you go up in rarity. The more advanced (and unusual) the armor is, the higher the item power.
Power Chart with Developer Explanation at the bottom[4] also by Devious
Want to learn more? Click UPAlbion.com.
Thursday, 2 June 2016
Albion Online - Overview of Hiring and Employing Labor
There are certain tedious tasks that are just better left up to automation sometimes. Sure, you need a steady flow of incoming wood and metal in Albion Online, but you don’t have the time to constantly harvest it yourself and play the game. That’s what the game’s laborers are for: taking care of menial tasks that keep basic materials or resources flowing while you devote your time to more elaborate goals.
Laborers can be hired for a reasonable initial cost, at which point the player can walk through a set of actions and request the laborer to follow the same basic pattern. The resultant haul will be less than what players could gather in the same amount of time, but it’ll mean that you can focus on more involved tasks than just gathering, crafting, or farming for money. Be aware, however, that laborers will require compensation for their work, adequate facilities, and a certain amount of space to themselves. Check out the video below for an overview of hiring and employing labor.
Do you want to learn more? click UPAlbion.com.
Laborers can be hired for a reasonable initial cost, at which point the player can walk through a set of actions and request the laborer to follow the same basic pattern. The resultant haul will be less than what players could gather in the same amount of time, but it’ll mean that you can focus on more involved tasks than just gathering, crafting, or farming for money. Be aware, however, that laborers will require compensation for their work, adequate facilities, and a certain amount of space to themselves. Check out the video below for an overview of hiring and employing labor.
Do you want to learn more? click UPAlbion.com.
Tuesday, 31 May 2016
Albion Online - Laborer And Housing System Relationship
What do you building your own house? This point is very important experience. Of course, Albion housing system isn’t going to be only about having a house that is decorated, that has no purpose but to be beautiful. Therefore the developer team developed the laborer system which is going to fill your house with life, it fills it with purpose, it gives you something to do with your player house.Of course, cheap albion gold can help you building a better house.
# How Laborers and Journal Work
Laborers can perform a variety of tasks for you, and this is to allow you to suit them to your playstyle. So if you’re a gatherer, you probably want to fill your house with gathering laborers. People who cut wood, or gather stone, or gather iron ore. To give a task to a laborer, you will need to give them a journal. A journal is an item you can acquire in an empty state from the laborer himself. So a woodcutter, for example, will be selling you woodcutting journals. And when you then go out and collect wood yourself, every time you do it a note will be put into the journal.
When you’ve you’ve got a nice full journal full of notes, then you take it back to your laborer and say, “Here’s my notes for the day, go do something useful with this.” And they’ll follow your notes, and go and cut down trees themselves and bring you back some more wood. You probably want to pick a laborer that matches the kinds of things you normally do in the game. If you do a lot of gathering, like you cut a lot of trees down, a wood cutting laborer would be really good for you, a lumberjack. If you mine a lot you want a mining type laborer. If you craft, there are crafting laborers. And if you spend a lot of time hunting the various factions in Albion, you can hire a mercenary laborer who will do that for you as well.
# How to Leveling Laborers
Laborers level up by performing tasks. The more tasks they do, the more experience they will gain, and once they’ve gained enough experience they will be ready to level up. By upgrading your laborers, they will perform better, they will give you more resources for each task you give them, and they will be able to give you better resources. Leveling them up, however, comes at a cost. They will rise in their expectations. They will require better furniture, better decorations to be happy, because they now feel they deserve it.
# Increasing Laborers Happiness
Much like in real life, you need to keep your workers happy in Albion online. If you’ve got some laborers then they’re going to have certain requirements. They’re going to want a decent bed and a decent table.
However, there are a lot of ways to go beyond this. For example, by placing trophies which are specific to the laborers interests, you can increase their happiness. A mercenary, for example, will be very interested in martial trophies. So if you have weapons or armors displayed on the wall, he will become happy. A woodcutter will be more interested in samples of woods or small saplings that you place in the house, and therefore your house will start to reflect the types of laborers that you have in them.
If your laborers are unhappy, then as they lose happiness, which happens over time, they will start to return less from their jobs, they’re not working as hard, they’re not as motivated, they’re not as effective. Below a certain point, they just won’t work for you anymore. They’ll stay in your house, but they won’t go out on jobs because they’re just not getting a good night’s sleep and they don’t feel up to it.
One of the interesting things about the way the laborers are set up is that they can’t just replace you doing work yourself. If you aren’t doing anything, you’re not filling journals, then the laborers can’t work without you, without your notes. Remember that laborers in Albion Online are not just a passive income source; it’s a multiplier on what you’re already getting.
# How Laborers and Journal Work
Laborers can perform a variety of tasks for you, and this is to allow you to suit them to your playstyle. So if you’re a gatherer, you probably want to fill your house with gathering laborers. People who cut wood, or gather stone, or gather iron ore. To give a task to a laborer, you will need to give them a journal. A journal is an item you can acquire in an empty state from the laborer himself. So a woodcutter, for example, will be selling you woodcutting journals. And when you then go out and collect wood yourself, every time you do it a note will be put into the journal.
When you’ve you’ve got a nice full journal full of notes, then you take it back to your laborer and say, “Here’s my notes for the day, go do something useful with this.” And they’ll follow your notes, and go and cut down trees themselves and bring you back some more wood. You probably want to pick a laborer that matches the kinds of things you normally do in the game. If you do a lot of gathering, like you cut a lot of trees down, a wood cutting laborer would be really good for you, a lumberjack. If you mine a lot you want a mining type laborer. If you craft, there are crafting laborers. And if you spend a lot of time hunting the various factions in Albion, you can hire a mercenary laborer who will do that for you as well.
# How to Leveling Laborers
Laborers level up by performing tasks. The more tasks they do, the more experience they will gain, and once they’ve gained enough experience they will be ready to level up. By upgrading your laborers, they will perform better, they will give you more resources for each task you give them, and they will be able to give you better resources. Leveling them up, however, comes at a cost. They will rise in their expectations. They will require better furniture, better decorations to be happy, because they now feel they deserve it.
# Increasing Laborers Happiness
Much like in real life, you need to keep your workers happy in Albion online. If you’ve got some laborers then they’re going to have certain requirements. They’re going to want a decent bed and a decent table.
However, there are a lot of ways to go beyond this. For example, by placing trophies which are specific to the laborers interests, you can increase their happiness. A mercenary, for example, will be very interested in martial trophies. So if you have weapons or armors displayed on the wall, he will become happy. A woodcutter will be more interested in samples of woods or small saplings that you place in the house, and therefore your house will start to reflect the types of laborers that you have in them.
If your laborers are unhappy, then as they lose happiness, which happens over time, they will start to return less from their jobs, they’re not working as hard, they’re not as motivated, they’re not as effective. Below a certain point, they just won’t work for you anymore. They’ll stay in your house, but they won’t go out on jobs because they’re just not getting a good night’s sleep and they don’t feel up to it.
One of the interesting things about the way the laborers are set up is that they can’t just replace you doing work yourself. If you aren’t doing anything, you’re not filling journals, then the laborers can’t work without you, without your notes. Remember that laborers in Albion Online are not just a passive income source; it’s a multiplier on what you’re already getting.
Thursday, 26 May 2016
In Addition to The Dungeon How Earn More Money in Albion Online
In fact, raising and selling mounts is one of the best ways of earning albion silver in Albion Online, second only to running through dungeons and defeating bosses.
The following video will guide you through the different steps you’ll need to go through to raise horses and oxes.
Tuesday, 24 May 2016
Albion Crafting - Gathering / Farms and Refining / Pastures
Now, we will talking Crafting. Crafting is the final step of a three-part process to create usable items, after Gathering / Farms and Refining / Pastures. The great majority of equipment and consumable items in Albion Online are made via crafting.
Crafting is developed separately from both Gathering and Refining on the Destiny Board. In addition, Crafting is divided thoroughly into very specific specialties. And then, the other should needs albion gold.
# Crafting Buildings
Like Refining, all crafting is done at a particular Building:
– Toolmaker: Tools, Accessories, and Furniture
– Alchemist’s Lab: Potions
– Cook: Food
– Saddler: Mounts
– Workbench: Basic equipment for new characters
– Warrior’s Forge: Warrior weapons and Plate armor
– Mage’s Tower: Mage weapons and Cloth armor
– Hunter’s Lodge: Hunter weapons and Leather armor
The crafting of Potions, Food, and Mounts are unlocked through Farming, while all other items listed above are unlocked through Trainee Craftsman.
# Spells & Reforging
Equipped items such as weapons and armor provide new abilities and/or perks to wearers, called Spells.
Weapons provide three active Spells (attacks) on Q, W, and E, armors provide three active Spells (defensive) on R, D, and F, and most non-weapon equipment provides a single passive Spell.
Often, several Spells will be available for a particular slot, especially when selecting a passive, but only one Spell can be active in any one slot at a time. This choice is first made when crafting the item, but Reforging allows players to change the Spells of their armor at any Repair Station.
# Hierarchy
Start
* Trainee Craftsman
Journeyman Toolmaker
– Demolition Hammer Crafter
– Sickle Crafter
– Skinning Knife Crafter
– Pickaxe Crafter
– Stone Hammer Crafter
– Axe Crafter
– Cape Tailor
– Bag Tailor
Journeyman Mage’s Tower Crafter
– Fire Staff Crafter
– [etc.]
Journeyman Hunter’s Lodge Crafter
– Bow Crafter
– [etc.]
Journeyman Warrior’s Forge Crafter
– Broadsword Crafter
– [etc.]
* Trainee Farmer
Alchemist
Cook
Harvester
– Mount Trainer
Crafting is developed separately from both Gathering and Refining on the Destiny Board. In addition, Crafting is divided thoroughly into very specific specialties. And then, the other should needs albion gold.
# Crafting Buildings
Like Refining, all crafting is done at a particular Building:
– Toolmaker: Tools, Accessories, and Furniture
– Alchemist’s Lab: Potions
– Cook: Food
– Saddler: Mounts
– Workbench: Basic equipment for new characters
– Warrior’s Forge: Warrior weapons and Plate armor
– Mage’s Tower: Mage weapons and Cloth armor
– Hunter’s Lodge: Hunter weapons and Leather armor
The crafting of Potions, Food, and Mounts are unlocked through Farming, while all other items listed above are unlocked through Trainee Craftsman.
# Spells & Reforging
Equipped items such as weapons and armor provide new abilities and/or perks to wearers, called Spells.
Weapons provide three active Spells (attacks) on Q, W, and E, armors provide three active Spells (defensive) on R, D, and F, and most non-weapon equipment provides a single passive Spell.
Often, several Spells will be available for a particular slot, especially when selecting a passive, but only one Spell can be active in any one slot at a time. This choice is first made when crafting the item, but Reforging allows players to change the Spells of their armor at any Repair Station.
# Hierarchy
Start
* Trainee Craftsman
Journeyman Toolmaker
– Demolition Hammer Crafter
– Sickle Crafter
– Skinning Knife Crafter
– Pickaxe Crafter
– Stone Hammer Crafter
– Axe Crafter
– Cape Tailor
– Bag Tailor
Journeyman Mage’s Tower Crafter
– Fire Staff Crafter
– [etc.]
Journeyman Hunter’s Lodge Crafter
– Bow Crafter
– [etc.]
Journeyman Warrior’s Forge Crafter
– Broadsword Crafter
– [etc.]
* Trainee Farmer
Alchemist
Cook
Harvester
– Mount Trainer
Monday, 23 May 2016
Albion Online | Full Guide on Laborers
Resources: UPAlbion.com.
Nice suggestions! This guide on Laborers that Sunarie put together is so good we had to share it outside the guild. We really hope this helps you make the most out of the game.
We hope this guide to Laborers helps people who are into crafting, logisitics or simply making the most efficient use of your time in game. Here is the video in a great deal of detail and with a few extra tidbits as well
Monday, 16 May 2016
The Rapid Escalation of Albion Online Tips - Craft
How fast leveling? using craft, I bet it’s better than nothing! using craft. Here’s a short and easy guide to make 2 levels in less than 10 minutes using craft!
Some things to know first :
- This is NOT an exploit bug
- Be prepared to spend 50 silver coins!
- If you don’t find some materials, read the entire guide!
First, you have to go to any capital city, find a cooking master, and ask him to be a chief. Then read the following intructions:
- Buy 10x Packet of Salt and 4x Black peppercorn in bulk to the cooking master
- Craft 100 Pile of salt and pepperBuy 10x Jar of vegetable oil and 10x Jar of vinegar
- Craft 100 Bottle of simple dressing
- Buy 10x Jug of water, 10x Bags of flour, 4x Eggs in bulk
- Craft 100 Pasta Noodles
- Buy 10x Bags of flour and 4x Butter in bulk
- Craft 100 Bowl of roux
- Buy 4x Bell pepper in bulk et 4x Chili pepper in bulk
- Craft 100 Pile of paprika
Once all those steps are done, you should have gained more or less 2 levels.
Last tips for your 10 minutes crafting session :
- The « in bulk » materials can be found in the second and third tabs of the cooking master’s shop.You must use the paper bag that appears in your bag to collect the material which will be used in crafting.
- All the mentioned components can be bought to the cooking master, except the Chili pepper
- The Chili pepper can be bought to Sagum Relicseeker in Plains of Ashford, near to the Ascalonian Catacombs. You first need to complete the associated renown heart to buy him the needed materials.
Are you understand? The more tips at UPAlbion.com. Good Luck!
Some things to know first :
- This is NOT an exploit bug
- Be prepared to spend 50 silver coins!
- If you don’t find some materials, read the entire guide!
First, you have to go to any capital city, find a cooking master, and ask him to be a chief. Then read the following intructions:
- Buy 10x Packet of Salt and 4x Black peppercorn in bulk to the cooking master
- Craft 100 Pile of salt and pepperBuy 10x Jar of vegetable oil and 10x Jar of vinegar
- Craft 100 Bottle of simple dressing
- Buy 10x Jug of water, 10x Bags of flour, 4x Eggs in bulk
- Craft 100 Pasta Noodles
- Buy 10x Bags of flour and 4x Butter in bulk
- Craft 100 Bowl of roux
- Buy 4x Bell pepper in bulk et 4x Chili pepper in bulk
- Craft 100 Pile of paprika
Once all those steps are done, you should have gained more or less 2 levels.
Last tips for your 10 minutes crafting session :
- The « in bulk » materials can be found in the second and third tabs of the cooking master’s shop.You must use the paper bag that appears in your bag to collect the material which will be used in crafting.
- All the mentioned components can be bought to the cooking master, except the Chili pepper
- The Chili pepper can be bought to Sagum Relicseeker in Plains of Ashford, near to the Ascalonian Catacombs. You first need to complete the associated renown heart to buy him the needed materials.
Are you understand? The more tips at UPAlbion.com. Good Luck!
Thursday, 5 May 2016
A Beginner's Guide to Albion Online 4
4. Territories, Player cities And Castles
# An introduction to Guild Vs Guild Mechanics
Guild Warfare
There are two ways by which to initiate Guild Warfare. One, via entering the world map (Hotkey: M) and selecting a territory next to one of yours, or by going to a territory monolith and then selecting "attack".
# An introduction to Guild Vs Guild Mechanics
Guild Warfare
There are two ways by which to initiate Guild Warfare. One, via entering the world map (Hotkey: M) and selecting a territory next to one of yours, or by going to a territory monolith and then selecting "attack".
Territory stats
There are two stats for territorial warfare: Defender Bonus and Defender Points
Defender Bonus: A stat change applied to the defenders of the territory, it goes up to +40% and down to -40%. This is modified by a guild's level of aggression over territory. Whenever you launch an attack from one territory your defender bonus will be lowered, meaning that a very aggressive guild which instigates many attacks on territories will have a much lower defender bonus than a relatively passive guild. Defender Points: A regenerating stat modified by Conquer battles lost (see below for an explanation of Conquering). A soon as a territory is claimed, the number of defender points attributed to that territory begins to increase gradually up to a maximum of 3. If the guild loses a Conquer attempt on the territory, the Defender Point total will drop by 1. Once the Defender Point total drops to 0, the guild must surrender the territory and hand it over to the triumphant enemy guild. If the guild manages to defend its territory from a Conquer attempt for long enough, the Defender Point they lost will regenerate. This gives a guild under attack three chances to defend their territory claim before it is usurped. Defender points facts:
- They are a representation of the ownership of your territory
- They regenerate by 1 point every 48 hours
- They are capped at 3 points
- If you lose a incoming 'conquer' attack, you lose a defender point
Attack methods
There are two modes of attack, with differing potential rewards: Raid and Conquer
Raid: Lowers target territory's Defender Bonus by 20, and raids 15,000 Silver from the enemy guild's guild vault - ideal for softening up a enemy before trying to conquer the territory.
Conquer: Lowers target territory's Defender Points by one point and lowers the target territory's Defender Bonus by 10, if defender points reaches zero then ownership of that territory is transferred to you.
# Territories & Territorial Warfare
Territories
Territories are areas of land owned by guilds. They provide a safe area inside an otherwise dangerous PvP-enabled area where guilds can build up their own buildings and shelters. Territories are fought over in Territorial Warfare,
Territorial Warfare
A player city with an incoming raid or conquer attempt active.
Territorial warfare facts:
- Territories have a maximum defender bonus of 40%, providing buffs for players during an attack. Attacking from a territory will cause the bonus to decrease quickly; being attacked will cause it to decrease slowly; and it will slowly regenerate over time.
- Territory fights are set to 5v5 players from either guild.
- During a territory fights only 10 participants are a part of the fight.
- During a battle, both teams begin with 100 points. Fights are ended at 31 minutes or if either team reaches 0 points.
# Player Cities & Player City Warfare
Player Cities
The region map of a player city.
A player city is a new type of territory which follows its own ruleset. Just like normal territories, they are owned and run by guilds. However, they are not a protected area only the owning guild can enter, but rather a free area for anyone to enter, rent plots for housing, and use buildings.
Player City facts
- Player cities feature 164 estates. Players who own one of these estates pay tax to the owning guild through the upkeep price of that estate.
- Player cities are mostly located around PvP-enabled regions, however they do not feature open world PVP, and serve as a safe bubble for people wanting to live in safety out in the wild.
- Player City fights are 20v20
- Compared to other safe areas, player cities allow higher tier buildings (up to tier 6)
- Estates in cities vary in size from very large, able to accommodate a couple of houses, to very small, accommodating just one.
Player City Warfare
A player city with an incoming raid or conquer attempt.
Player city warfare facts:
- Player cities have a maximum defender bonus of 0%, instead of the 40% that normal territories have
- Player cities are, like territories, inaccessible during guild fights to anyone not a part of either the attacker or defender team
- Both teams have 400 points instead of the standard 100 points, and fights are able to last up to 45 minutes
# Castles
Castles are clearly visible on the world map.
Before getting into a castle, you need to destroy one of its gates using 'Destruction Hammers'
Castles have been overhauled since the last test. They now serve the purpose of allowing guilds with no territory in a region to siege territories from the castle.
Castle facts:
- Castles exist in some of the full PvP-enabled regions
- Castles are protected by NPC guards. These guards are loyal to the owners of the castle and will help the current owners protect it.
- Castle fights are completely open - there's no limit on how many players can attack or defend them... So prepare for the worst.
- Castles have a monolith just like a territory would, and to claim it an attacking guild must first defeat the Castle Lord
- Castle attacks has 4 phases in total (detailed below)
- When a castle is attacked, warning messages are sent out to the owner of the castle as well to all of the players in that region.
- It should take 30-60 minutes to successfully capture a castle.
- If you lose the castle any scheduled fights from the castle are cancelled, so make sure you capture the castle in good time for a territory fight or you might have to defend it.
Castle attacks
Phase 1
Player attacks the castle gate (As seen on the picture above). A message is sent out to the owners informing them they are under attack
Phase 2
The gate is now destroyed and the players enter the castle to kill off the standard NPC guards.
Phase 3
After the standard guards are all dead, the elite guards will spawn in 15 minutes.
Phase 4
Now that the elite guards are dead, the castle lord will spawn after 15 minutes. This is the final step in the castle capture process. The guild of the player who strikes the final blow on the castle lord will gain the ownership of the castle.
Important notes:
- Castle attacks are difficult. The guards at first will be quite easy but after that the elite guards and the castle lord will be a challenge. Make sure to bring enough people (Recommended 10-15) and to equip yourself accordingly (Tier 4+ recommended)
- You will need destruction hammers to get through the castle.
- Some castles have several entrances. The owners of the castle are able to use the doors. Keep an eye out for intruders.
- Lengthy fights could cause some items to break, so it's wise to pack some extra gear just in case.
End
A Beginner's Guide to Albion Online 3
# Building, Housing & Furniture Guide
- Buildings
The building menu can easily be accessed by pressing the hotkey "B"
Buildings are split into three categories, Economy, Military and Player House
Economy:
Under the Economy tab you will find all economy related buildings. This includes the refinement buildings, the repair & salvage station, the toolmaker and the transmutator.
Military:
Under the Military tab you will find all the buildings focused on crafting war gear. This includes the warrior's forge, hunter's lodge and the m[b]age's tower[/b]
Player House:
Under the Player House tab you will find all the housing related buildings. This includes the p[b]layer houses[/b] and the guild halls
Holding down the info button shows the construction cost of the building
If you are able to build the building on this location it will be shown as green. If not it will turn red, with a warning message informing you that the ground is unsuitable for construction
During building construction you need to provide all the required resources and the required silver.
Once all the resources have been put into the building, the construction is finished and the building will appear.
- Housing
In front of all houses there is a sign post. If you click on this, you will access the house management menu
The house management menu
Residency System
The residency system is also a new feature to the housing system. When you open up the house management menu you will see in the house infobox a button called either "Make Home" or "Leave Home" this allows you to set your home location, which will be a respawn point for you when you die,
Residency is also limited, meaning there can only be a certain amount of people who are residents in each house. However, you can increase the residency slots by placing wardrobes in the house.
Guild halls are an excellent choice for guilds who plan to live together, as they offer a lot more resident slots (as well as furniture slots), allowing larger guilds to live out of a guild hall.
Houses are built empty, and it's up to you to furnish them with the furniture you want.
The furniture item's menu, which appears if you click on it
Furniture placement mode
The guilds are able to add their own guild description, which will come in handy for players choosing between guilds
# Destiny Board & Mastery Levels
- Destiny Board
The destiny board can be divided into three categories, Combat, Crafting and Gathering.
Combat:
Combat skills are progressed by killing foes. You unlock equipment of a higher tier by gaining kills with that same equipment of the tier below.
Crafting:
Crafting skills are progressed by crafting
Gathering:
Gathering skills are progressed by gathering. Unlocking these skills will allow you to use better gathering tools, thus enabling you to gather higher tier resources.
- Mastery Levels
Working on unlocking the Novice Craftsman skill
Mastery levels are a new addition to Albion Online. They allow you to specialize in a specific skill and in turn hone that skill. For example, gaining a significant amount of kills with a tier 4 sword will grant you bonuses when using a tier 4 sword.
Combat equipment unlocks
Mastery Level ——— Unlocks
Mastery level 1 ——— Equipment item unlock
Mastery level 2 ——— +5% main stat* with that item
Mastery level 3 ——— +5% main stat* with that item
Mastery level 4 ——— +5% main stat* with that item
Mastery level 5 ——— +5% main stat* with that item
- Buildings
The building menu can easily be accessed by pressing the hotkey "B"
Buildings are split into three categories, Economy, Military and Player House
Economy:
Under the Economy tab you will find all economy related buildings. This includes the refinement buildings, the repair & salvage station, the toolmaker and the transmutator.
Military:
Under the Military tab you will find all the buildings focused on crafting war gear. This includes the warrior's forge, hunter's lodge and the m[b]age's tower[/b]
Player House:
Under the Player House tab you will find all the housing related buildings. This includes the p[b]layer houses[/b] and the guild halls
Holding down the info button shows the construction cost of the building
If you are able to build the building on this location it will be shown as green. If not it will turn red, with a warning message informing you that the ground is unsuitable for construction
During building construction you need to provide all the required resources and the required silver.
Once all the resources have been put into the building, the construction is finished and the building will appear.
- Housing
In front of all houses there is a sign post. If you click on this, you will access the house management menu
The house management menu
Residency System
The residency system is also a new feature to the housing system. When you open up the house management menu you will see in the house infobox a button called either "Make Home" or "Leave Home" this allows you to set your home location, which will be a respawn point for you when you die,
Residency is also limited, meaning there can only be a certain amount of people who are residents in each house. However, you can increase the residency slots by placing wardrobes in the house.
Guild halls are an excellent choice for guilds who plan to live together, as they offer a lot more resident slots (as well as furniture slots), allowing larger guilds to live out of a guild hall.
-Furniture
Furniture can put into two different categories, i[b]ndoor furniture[/b] and outdoor furniture.
The furniture item's menu, which appears if you click on it
Furniture placement mode
Furniture interaction menu. Furniture buffs last a long time, but can take a long time to refresh
Furniture - Purpose
Chest - Storage
Battlevault - Storage for GvG fights
Wardrobe - Increases residency slots in a house
Mob trophies1, Bed and Table - Buff furniture
Flag/Banner - Displays your guild symbol (Vanity)
1. Mob trophies can be anything from a special drop from a boss to a boar's head.
Each house has a limit on the amount of furniture placed in it. You are also unable to place a furniture item whose tier is higher that that of the house, so a tier 4 house can only support up to tier 4 furniture.
# Finding a guild
When you are not in a guild, this is how the guild menu will appear (Hotkey 'G')
The filters allow you to only show guilds that fit your needThe guilds are able to add their own guild description, which will come in handy for players choosing between guilds
# Destiny Board & Mastery Levels
- Destiny Board
The destiny board can be divided into three categories, Combat, Crafting and Gathering.
Combat:
Combat skills are progressed by killing foes. You unlock equipment of a higher tier by gaining kills with that same equipment of the tier below.
Crafting:
Crafting skills are progressed by crafting
Gathering:
Gathering skills are progressed by gathering. Unlocking these skills will allow you to use better gathering tools, thus enabling you to gather higher tier resources.
- Mastery Levels
Working on unlocking the Novice Craftsman skill
Mastery levels are a new addition to Albion Online. They allow you to specialize in a specific skill and in turn hone that skill. For example, gaining a significant amount of kills with a tier 4 sword will grant you bonuses when using a tier 4 sword.
Combat equipment unlocks
Mastery Level ——— Unlocks
Mastery level 1 ——— Equipment item unlock
Mastery level 2 ——— +5% main stat* with that item
Mastery level 3 ——— +5% main stat* with that item
Mastery level 4 ——— +5% main stat* with that item
Mastery level 5 ——— +5% main stat* with that item
*Main stat depends on the type of equipment; an armor piece will give more health and a weapon will give a boost to damage
Harvesting equipment unlocks
Mastery Level ——— Unlocks
Mastery level 1 ——— Equipment item unlock
Mastery level 2 ——— +2.5% Gathering yield
Mastery level 3 ——— +2.5% Gathering yield
Mastery level 4 ——— +2.5% Gathering yield
Mastery level 5 ——— +2.5% Gathering yield
Crafting equipment unlocks
Mastery Level ——— Unlocks
Mastery level 1 ——— Item recipe unlock
Mastery level 2 ——— Higher chance to craft a higher quality version of the item
Mastery level 3 ——— Higher chance to craft a higher quality version of the item
Mastery level 4 ——— Higher chance to craft a higher quality version of the item
Mastery level 5 ——— Higher chance to craft a higher quality version of the item
It's important to note that some skills do not have mastery levels, such as the resource refinement skills and those to do with overall fame progression.
# Mounts
Mounts currently come in three different kinds: Normal Horse, Armored Horse and Oxen
Mounts are expensive, but a good investment. Horses can greatly reduce your travel time in the world of Albion, and oxen can be a great way to move around large quantities of items.
Stables
The only way to get a mount is in a stable. Stables are only found in cities (both player and non-player cities) and cannot be built by players.
Mount health
Mounts have their own health, however it's important to note that a mount's health and its durability are two separate measures.
When the mount's health reaches zero, you will be instantly forced into dismount mode, though the mount will not receive durability loss, and you will be able to spawn your mount again afterwards.
The durability for mounts functions the same as with any other item in the game - once it reaches zero, the item gets destroyed or in this case, the mount dies.
# Death & Resurrection
Resurrection:
To resurrect a dying player, first select the resurrect spell and then click on the dying body.
The ability to resurrect players is a new feature for Albion Online. The Staff of Restoration now offers the option to select a Resurrection spell which allows the player to resurrect dying players. Players who are dying will be lying on the ground with their gear still visible on their body (as seen in image)
A dying player will stay on the ground for up to 10 minutes as long as he or she does not trigger a respawn by selecting a location on the respawn screen. Dying players are still lootable, and any removal of their equipment will be visually represented on the character.
Loot:
When you die in Albion Online all your items drop on the ground. In PvP areas any player is able to loot items immediately, while in safe areas there is a 10 minute grace period during which only you are able to pick them up. Thus, if you do die in a safe area, you are able to quickly run back and pick up your stuff again (perhaps most reliably by selecting the respawn location "This Area")
# The Mail System
To be continued...
A Beginner's Guide to Albion Online 2
3. General game play guides
# Gathering
Gathering & Refining resources
Gathering comes in two forms, one being materials and the other animal hides. Materials are resources found out in the world (Wood, Stone, Ore, Fibre and Gems), and hides are harvested from dead animals using a Skinning Knife.
All types of gathered resources (except for tier 1 Wood & Stone) require tools to harvest. These tools can all be crafted at the toolmaker.
Material type - Requires tool
Wood - Wood Axe
Stone - Stone Hammer
Ore - Pickaxe
Animal Hides - Skinning Knife
Fiber - Sickle
Gems - Gem Hammer
Hide gathering
Material gathering
Refining
All materials above tier one need to be refined for crafting. The process of refining has its own class of building.
Raw material - Refines at
Wood - Carpenter
Stone - Stone Mason
Ore - Smelter
Hides - Tanner
Fiber - Weaver
Gems - Stone Mason
# Gathering
Gathering & Refining resources
Gathering comes in two forms, one being materials and the other animal hides. Materials are resources found out in the world (Wood, Stone, Ore, Fibre and Gems), and hides are harvested from dead animals using a Skinning Knife.
All types of gathered resources (except for tier 1 Wood & Stone) require tools to harvest. These tools can all be crafted at the toolmaker.
Material type - Requires tool
Wood - Wood Axe
Stone - Stone Hammer
Ore - Pickaxe
Animal Hides - Skinning Knife
Fiber - Sickle
Gems - Gem Hammer
Hide gathering
Material gathering
Refining
All materials above tier one need to be refined for crafting. The process of refining has its own class of building.
Raw material - Refines at
Wood - Carpenter
Stone - Stone Mason
Ore - Smelter
Hides - Tanner
Fiber - Weaver
Gems - Stone Mason
# World & Region Maps - Finding your way in Albion Online
World Map
Region map / Safe areas
Region map / PvP-enabled areas
# Dungeons - A good source of Silver & Fame
Most regions in Albion Online have a dungeon. The dungeons follow the rule-set of the region to which they are connected. This means that if you enter a dungeon in a non-PvP area the dungeon will also not allow PvP, however if you enter a dungeon in a PvP-enabled area the dungeon will also allow for PvP.
Dungeons in Albion Online are unrestricted and non instanced, and as such you may run into other people while inside.
Mob ranks
Mobs come in three different ranks: Standard, Veteran and Elite
# Item Tiers, Durability & Quality
Item tiers
Currently there are 8 tiers of items. The higher the tier, the stronger the item. Items have a linear progression of around 20-30% per tier.
Durability
All equipment items in Albion Online have durability. When the durability reaches 0 the item breaks, and turns into trash.
Item Quality
Item quality is another new addition to Albion Online. Every item crafted has now a small chance to appear as a higher quality. The higher your crafting mastery is with a particular item, the higher chance you have at crafting a higher-quality item.
# Real estates
Estates function similar to territories, however they are smaller and are owned by players instead of guilds. Estates offer solo players the chance to own a plot of land where they can build whatever buildings they choose. It could prove a safer place to build a home, considering players then do not have the risk of losing the estate through guild fights, and the only way they could lose it is lack of upkeep payments.
Estates can be located in safe areas and in player cities. Player cities are safe and are commonly found in the vicinity of PvP-enabled regions, allowing solo players to have their safe home in the more dangerous wilderness of Albion.
Estates can be sold to other players, which means they can be a lucrative investment.
Finding an estate
Beige-colored squares on the minimap are real estates
An unowned real estate has a question mark on the estate management signpost
Managing a Real Estate
The estate management menu appears when you click on the estate signpost
Customization:
Currently you can customize the border to your territory by replacing the the marked stakes in the ground with either a stone wall or a wooden fence.
Access Rights:
The access rights system has three presets and the option to customize the access rights. The presets are:
Preset - Rule set
Closed - Only you are allowed to build buildings in the estate
Private - Only you and your guild is allowed to build buildings in the estate
Public - Everyone is allowed to build buildings on the estate
Sell a real estate plot
Estates for sale will have a "For Sale" sign attached to them
Under the real estate menu you are able to put up your estate for sale, and other players are able to buy it
If you buy an real estate plot, you are able to claim ownership of all buildings & furniture placed on the plot
Subscribe to:
Posts (Atom)